Why use a boring bookmark when you can fold a stunning origami butterfly? This elegant paper craft adds a touch of magic to any book!
How to Make a Beautiful Origami Butterfly Bookmark

Difficulty: Intermediate
Fold a stunning origami butterfly bookmark with our step-by-step guide! A perfect craft for book lovers and origami enthusiasts.
Step 1

1
Start with a rectangular piece of paper. I am using an 10cm×15cm paper. If you’re starting with a square piece of origami paper you need to cut off one third.
Step 2

2
If you are using a two color sided paper then face the lighter side upwards.
Step 3

3
Fold the paper in half from top to bottom.
Step 4

4
Fold in half from left to right.
Step 5

5
Unfold.
Step 6

6
Take the right-hand side and open it.
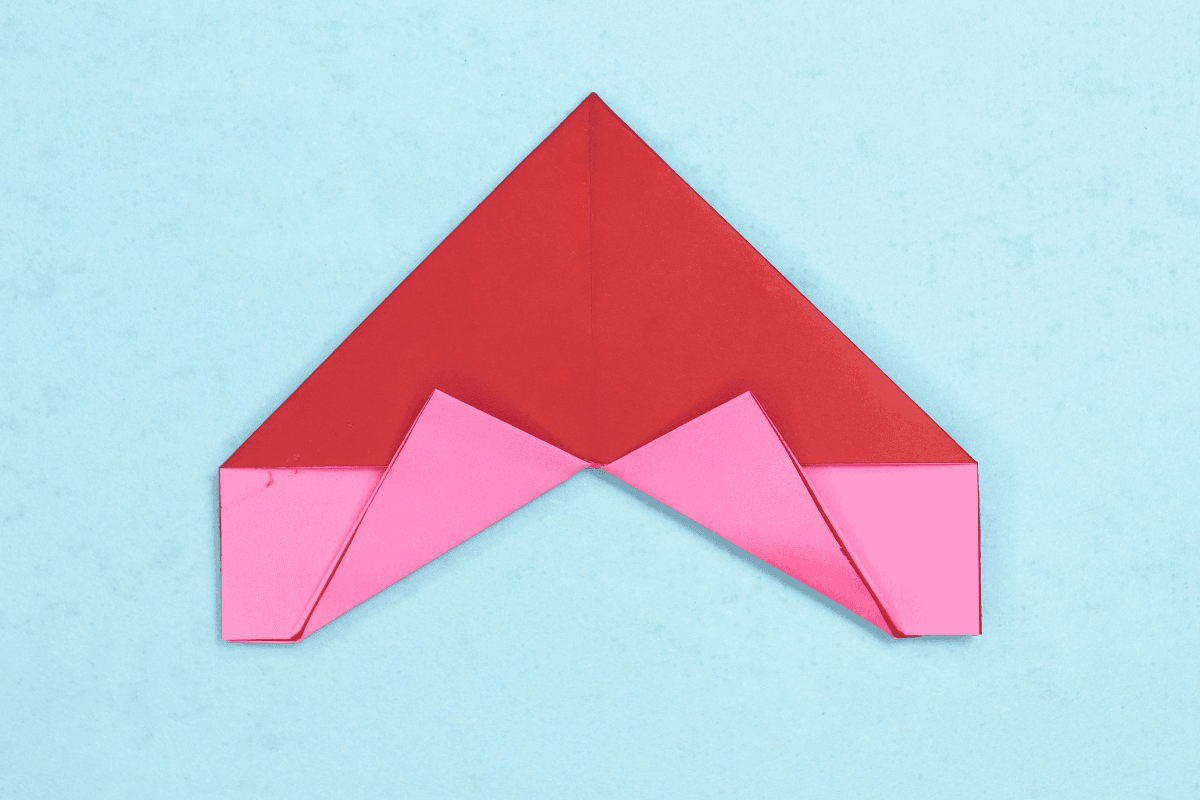
Step 7

7
Squash down to make a triangle by lining up the top fold to the center fold.
Step 8

8
After squashing it completely it will look like the image.
Step 9

9
Fold the flap back to the right.
Step 10

10
Take the left-hand side and open it.
Step 11

11
Squash down to make a triangle by lining up the top fold to the center fold.
Step 12

12
Turn the model over.
Step 13

13
fold the first flap on the left back to the right like a page in a book.
Step 14

14
Fold the bottom right corner upwards.
Step 15
15
Fold the bottom left corner upwards.
Step 16

16
Unfold the both corners.
Step 17

17
Take one of the folds and unfold it.
Step 18

18
Open it as shown.
Step 19

19
Push the folds inwards to make a triangle.
Step 20

20
Press flat.
Step 21

21
Now open the left side.
Step 22

22
Push the folds inwards to make a triangle.
Step 23

23
Press flat.
Step 24

24
To make the wings take one of the folds and gently pull up.
Step 25

25
Repeat on the other side.
Step 26

26
Rotate the butterfly as shown.
Step 27
27
Voila! Now you have a beautiful butterfly bookmark.
Share and Comment
We would love to see your creations! Scroll down to the comments section and share a photo of your origami.
Leave a Reply