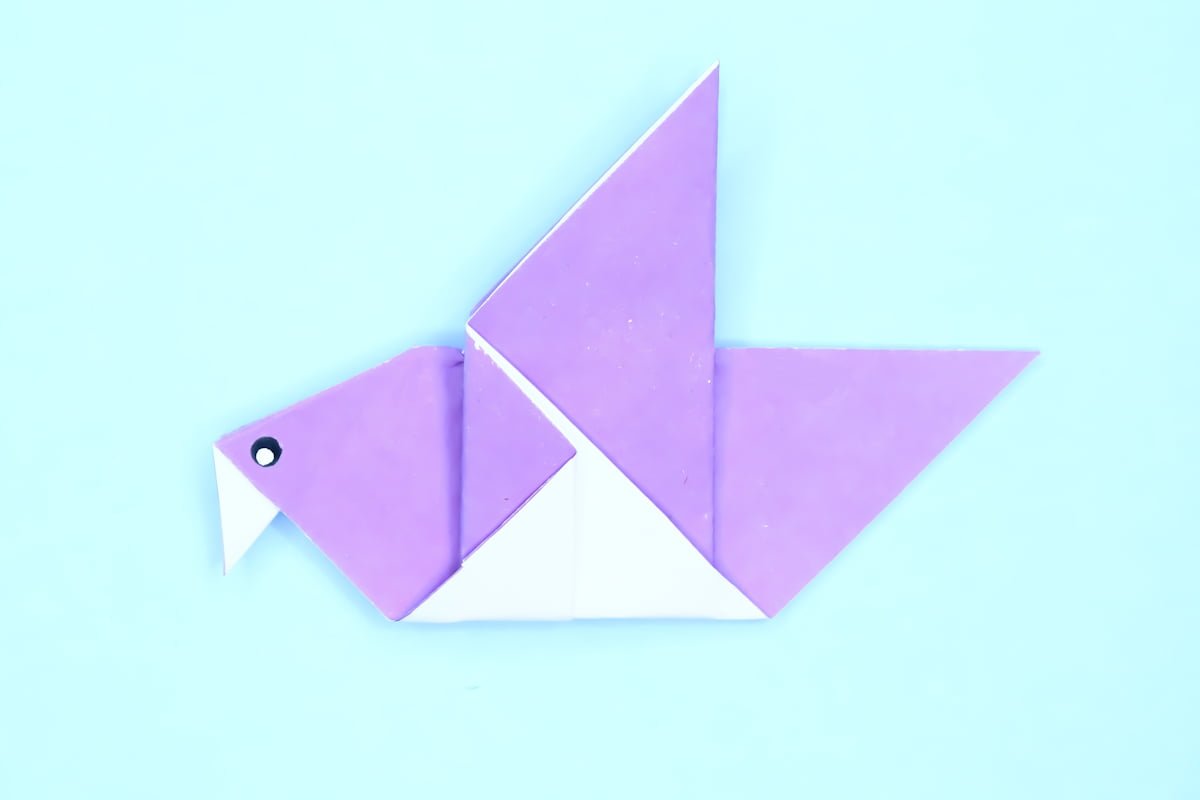
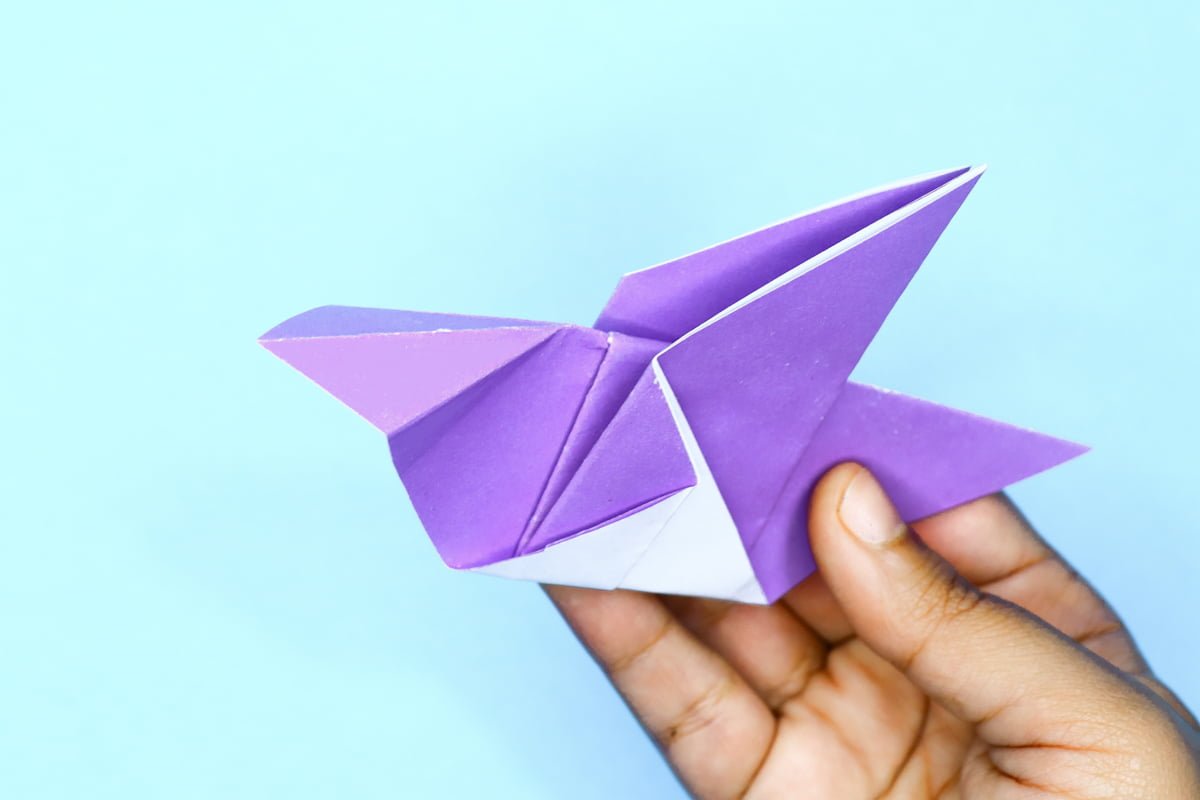
Origami birds with wings are usually more complex than this, but this bird is very easy to fold. It only takes a few simple steps and the result is almost as awesome as the more complex ones. This bird can also pass for a pigeon or a dove.
Easy Origami Bird Instructions for Beginners
Category: Origami Birds
Difficulty: Easy
This origami bird is really easy to fold. In just a few steps, you will learn how to fold your own beautiful bird.
Step 1

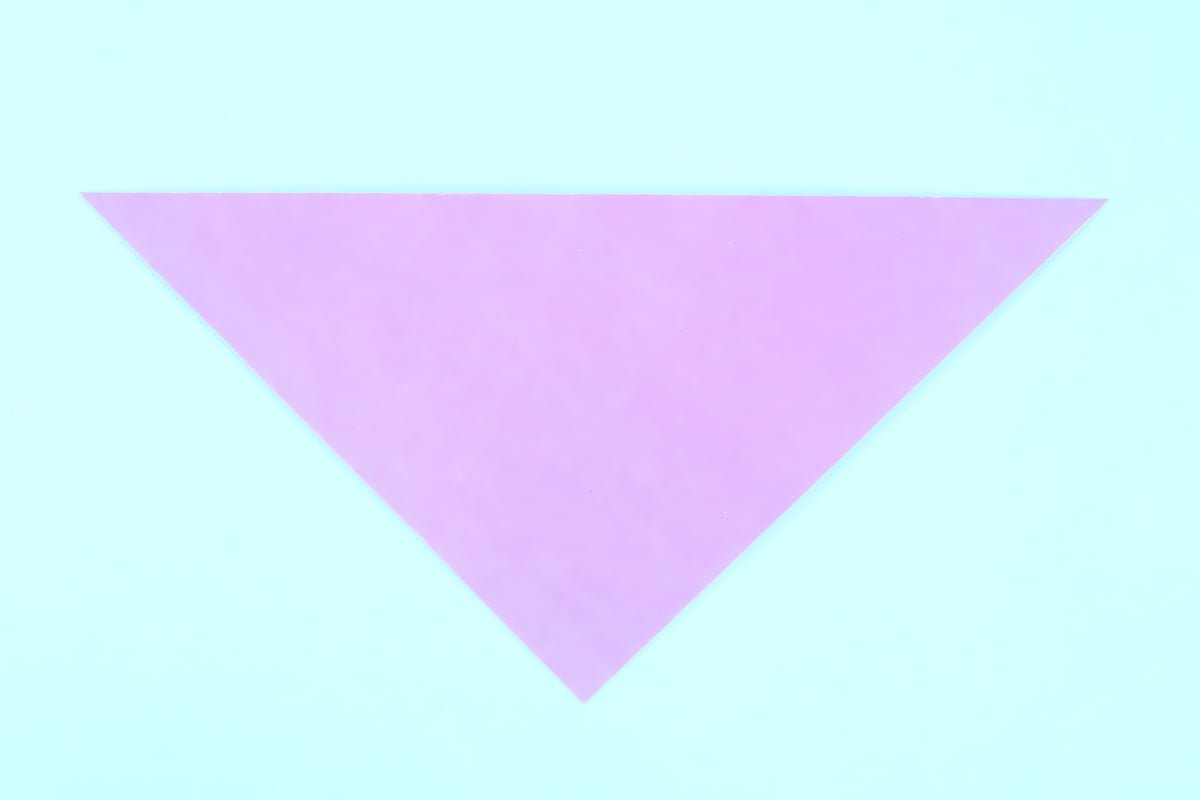
1
Start with a square piece of origami paper. I am using an 7×7 inches origami paper.
If you only have regular paper, follow these instructions on how to make a square origami paper.
If you only have regular paper, follow these instructions on how to make a square origami paper.
Step 2

2
Face the lighter side upwards and move the paper diagonally.
Step 3
3
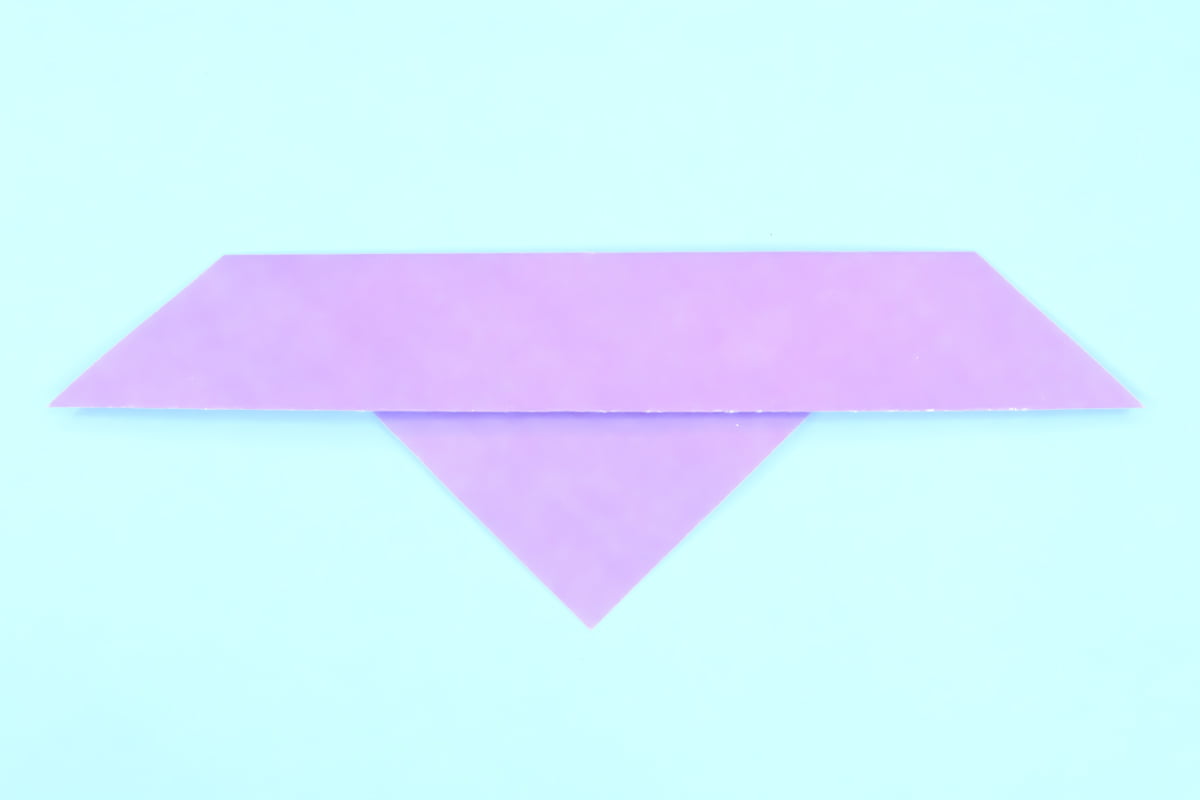
Fold the paper in half by folding the top corner to the bottom corner.
Step 4
4
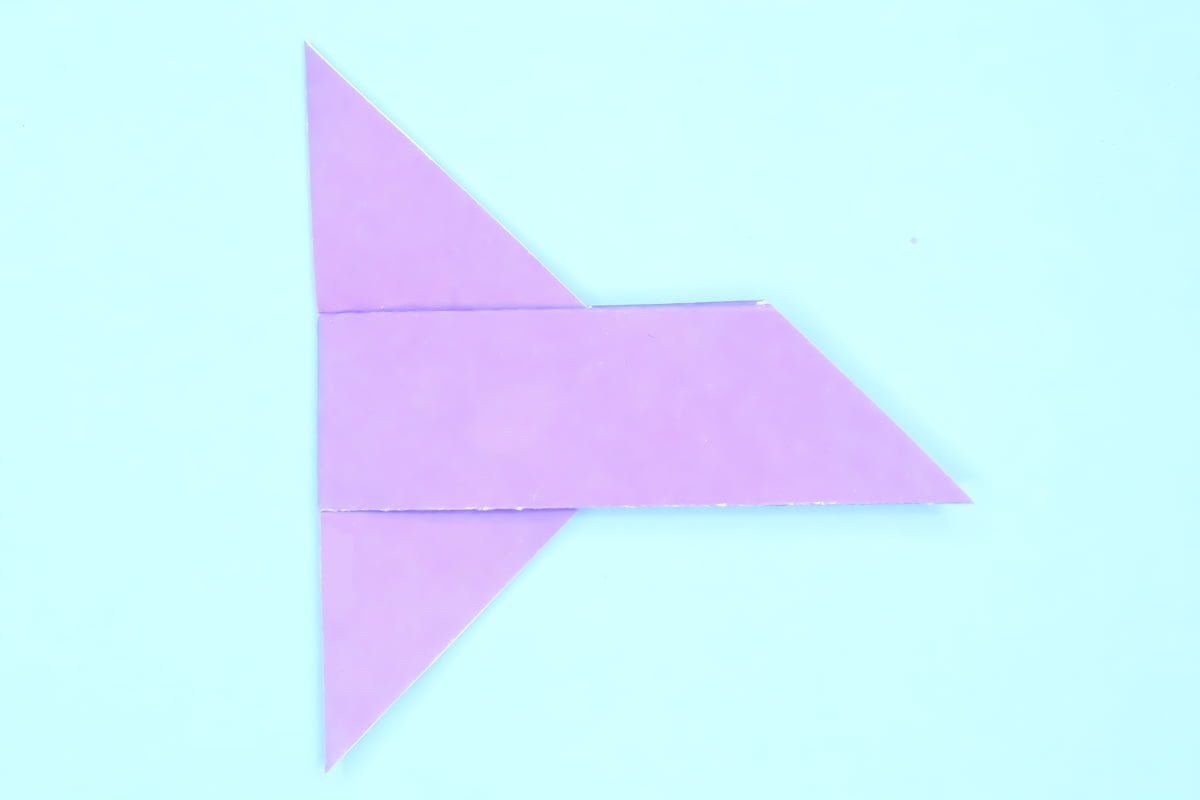
Fold part of the top down so that the edge is about halfway down. Don’t make this flap too thin because this will become the wings.
Step 5
5
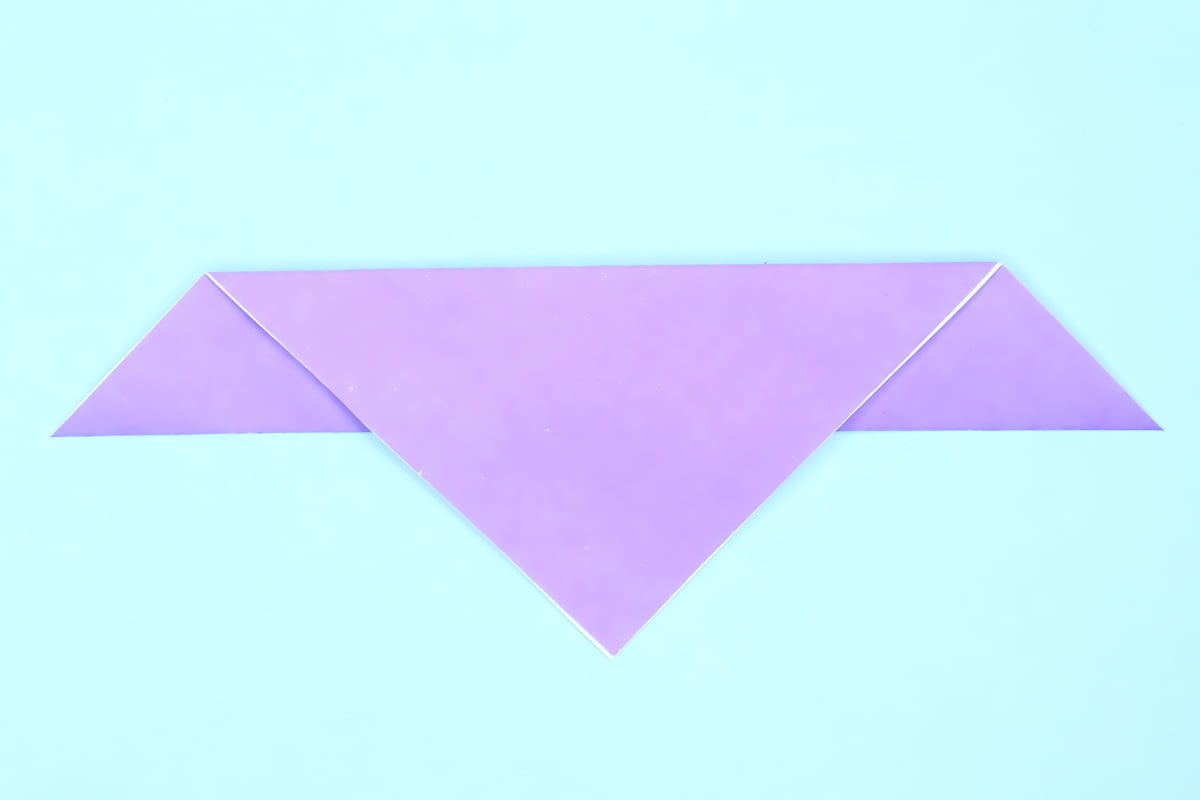
Turn the paper over.
Step 6

6
Take the bottom corner of the top layer and fold it up like this.
Step 7
7
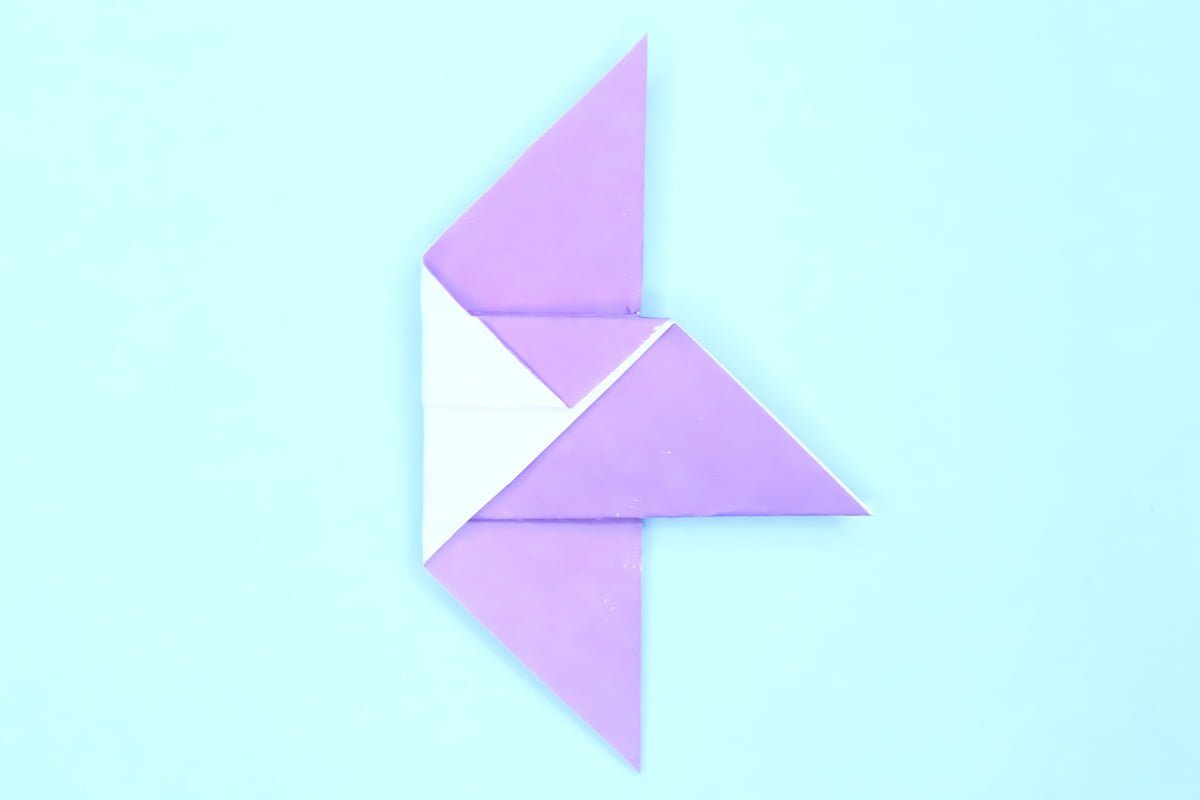
Fold the figure in half by folding the left side over to the right.
Step 8

8
Now fold that same flap back like this to make one of the wings.
Step 9

9
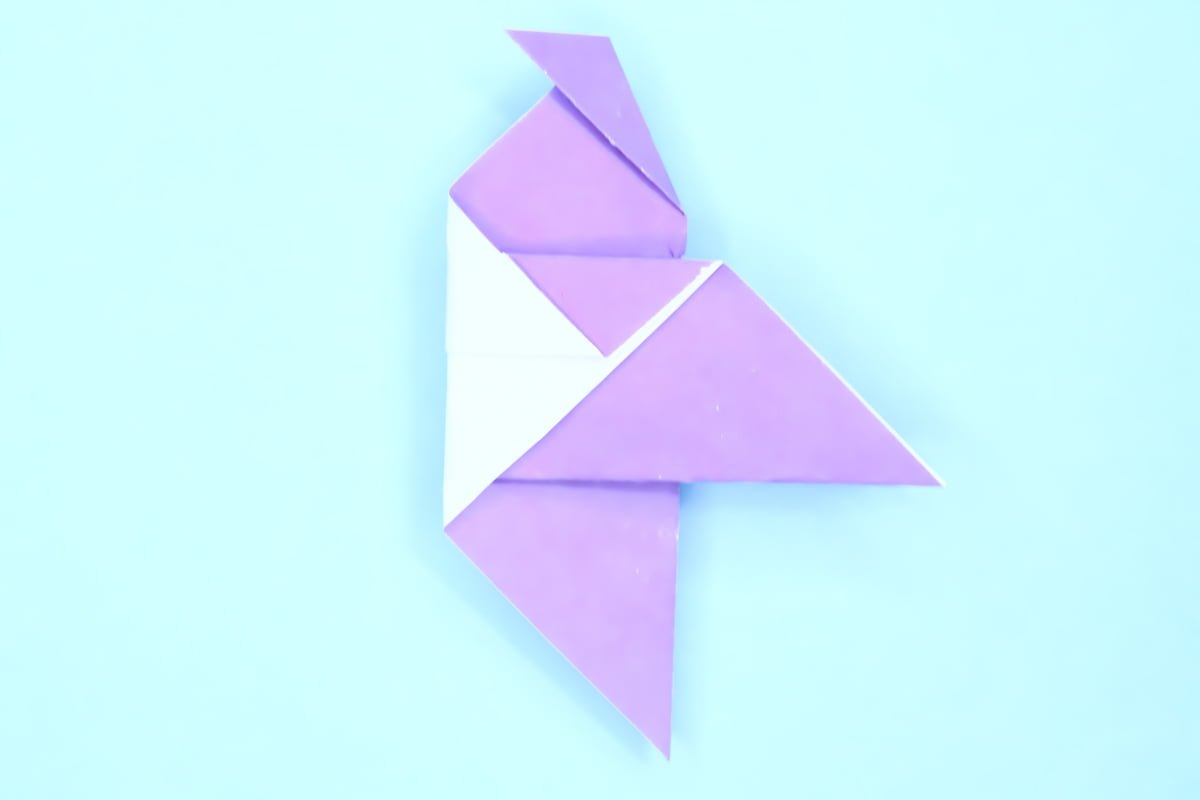
Turn the figure over.
Step 10
10
Fold the flap back like this to make the other wing.
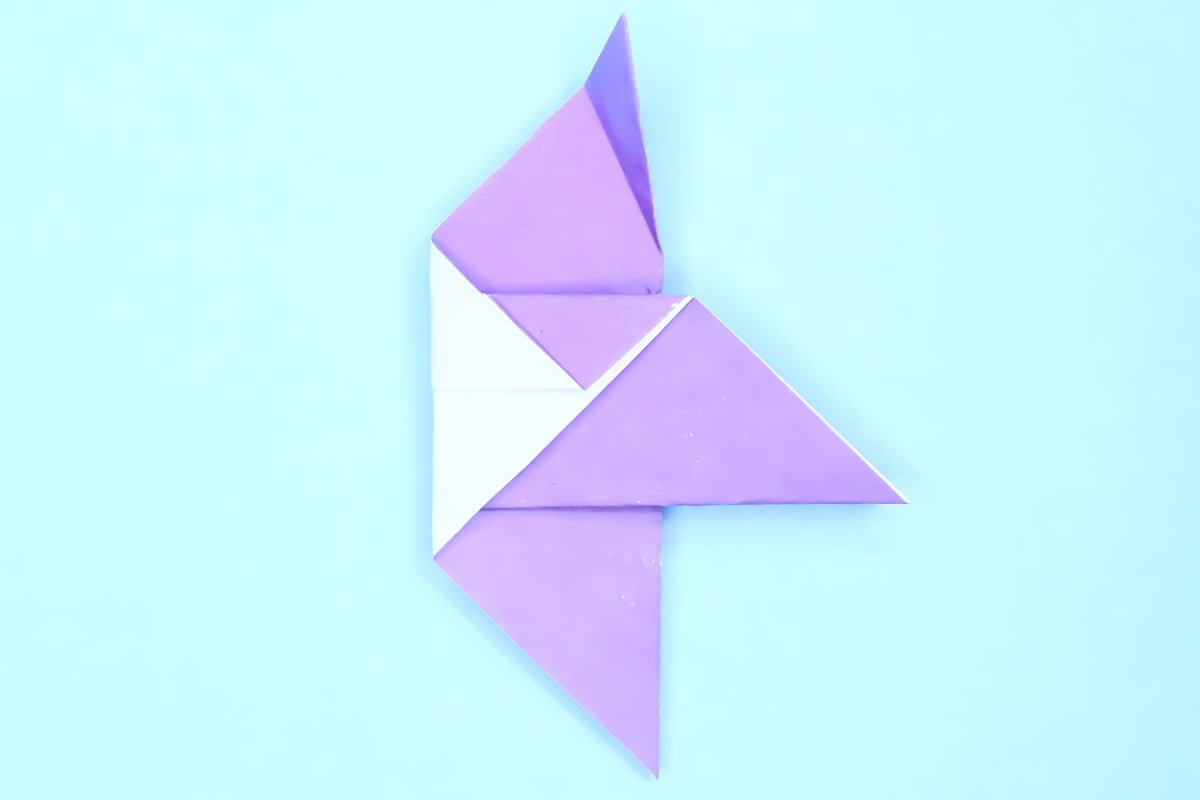
Step 11
11
Fold the head as shown.
Step 12
12
Unfold.
Step 13
13
Open the flaps of the head.
Step 14

14
Push the center of the head in and flatten. This is called an inside reverse fold.
Step 15
15
Draw the eyes and tada! Now set it free! Just kidding. Don’t throw it in the air. It will just fall down and you’ll be disappointed.
Share and Comment
We would love to see your creations! Scroll down to the comments section and share a photo of your origami.
Comments
One response to “Easy Origami Bird Instructions for Beginners”

Cool! Thanks for showing me an easy tutorial
Leave a Reply