Learn how to fold an easy origami walrus with these step-by-step photo instructions. It’s very simple so kids of all ages should be able to make one themselves.
Easy Origami Walrus Instructions

Difficulty: Easy
Learn how to fold a cute origami walrus in minutes! Our step-by-step guide is beginner-friendly and fun for all ages.
Step 1

1
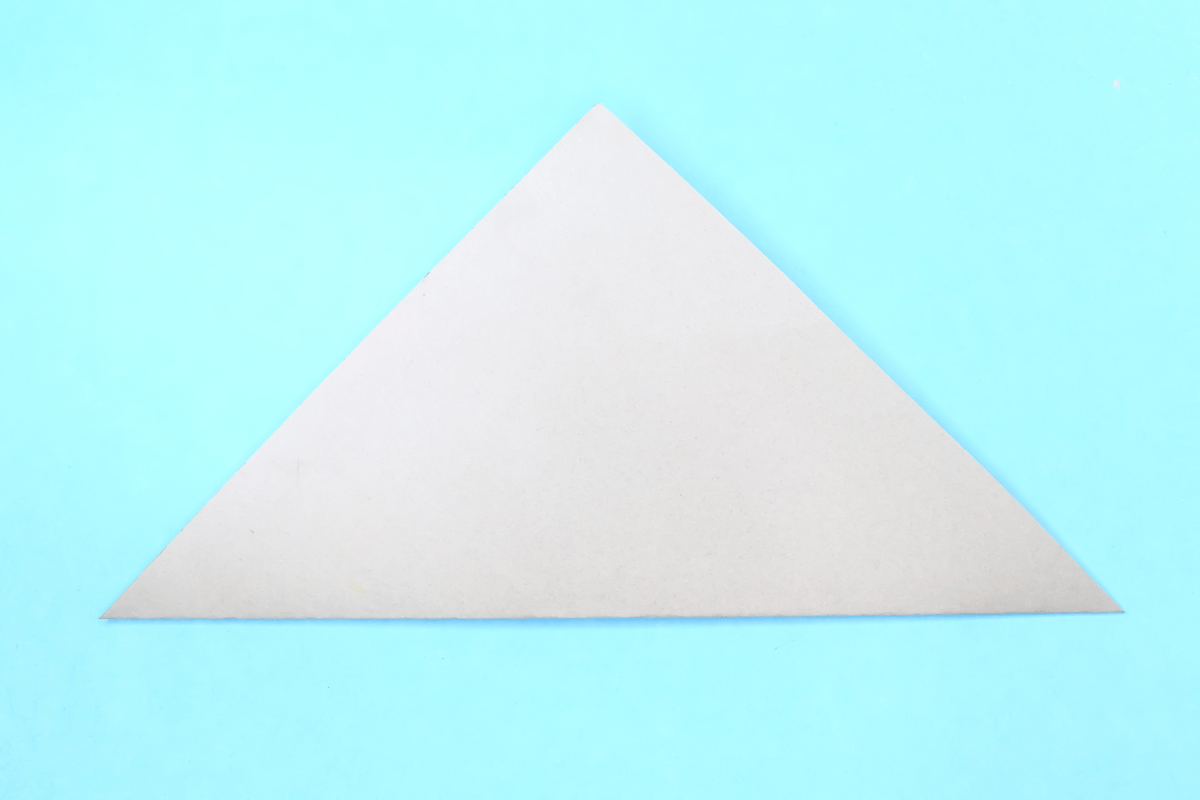
Start with a square sheet of origami paper. I am using an 7×7 inches origami paper.
If you only have regular paper, follow these instructions on how to make a square origami paper.
If you only have regular paper, follow these instructions on how to make a square origami paper.
Step 2
2
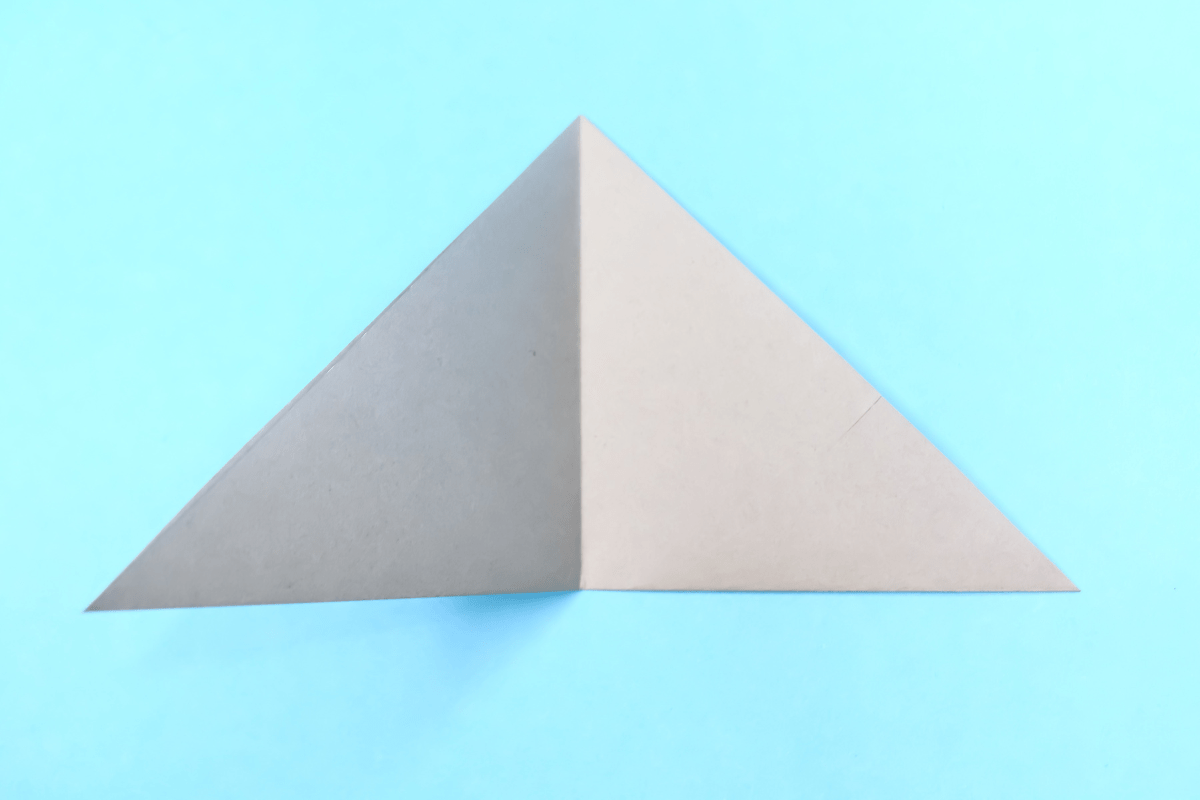
Fold paper in half by folding the bottom corner to top corner.
Step 3

3
Let’s create a crease in the middle. Fold in half again by folding left corner to right corner.
Step 4
4
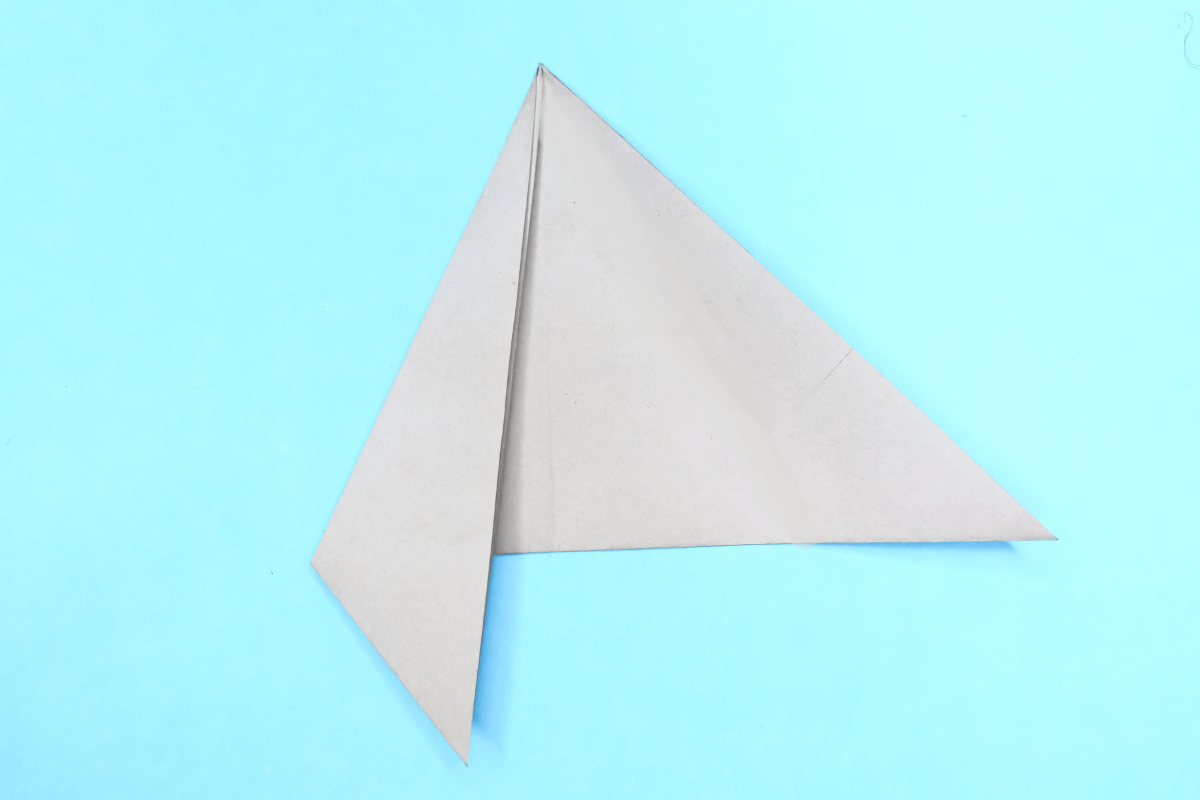
Unfold.
Step 5
5
Now fold the left edge of the triangle to the center crease, but not directly on the crease. Leave a little gap.
Step 6

6
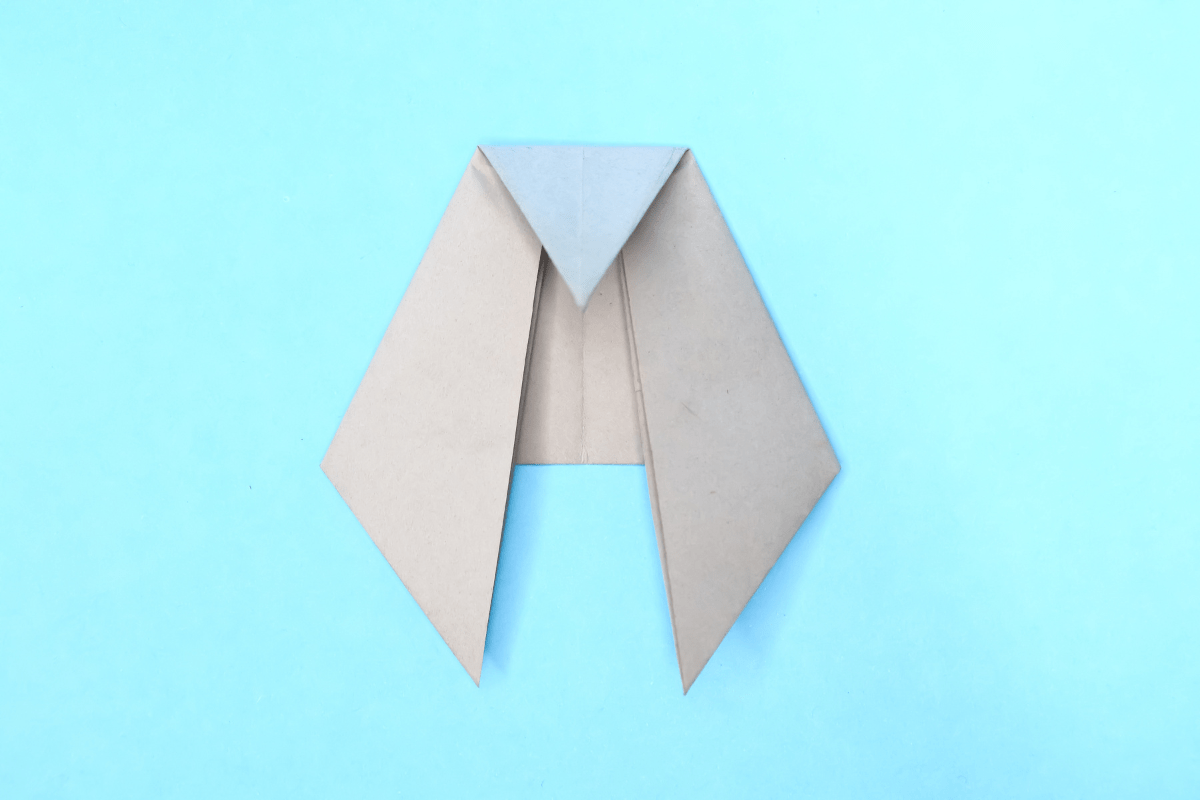
Fold the right edge of the triangle to the center crease, but not directly on the crease. Leave a little gap.
Step 7
7
Fold the top down by approximately this much.
Step 8
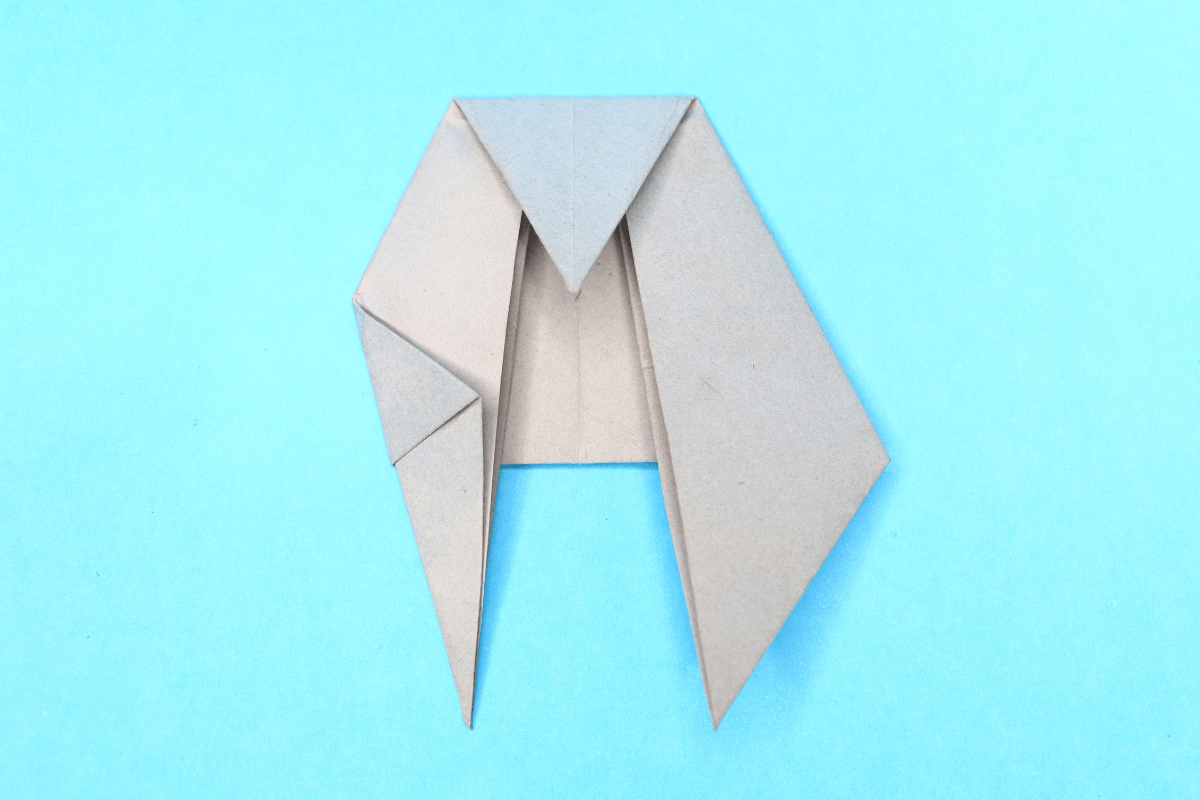
8
Fold in the edge of left bottom flap like this.
Step 9
9
Now fold in the edge of right bottom flap like this.
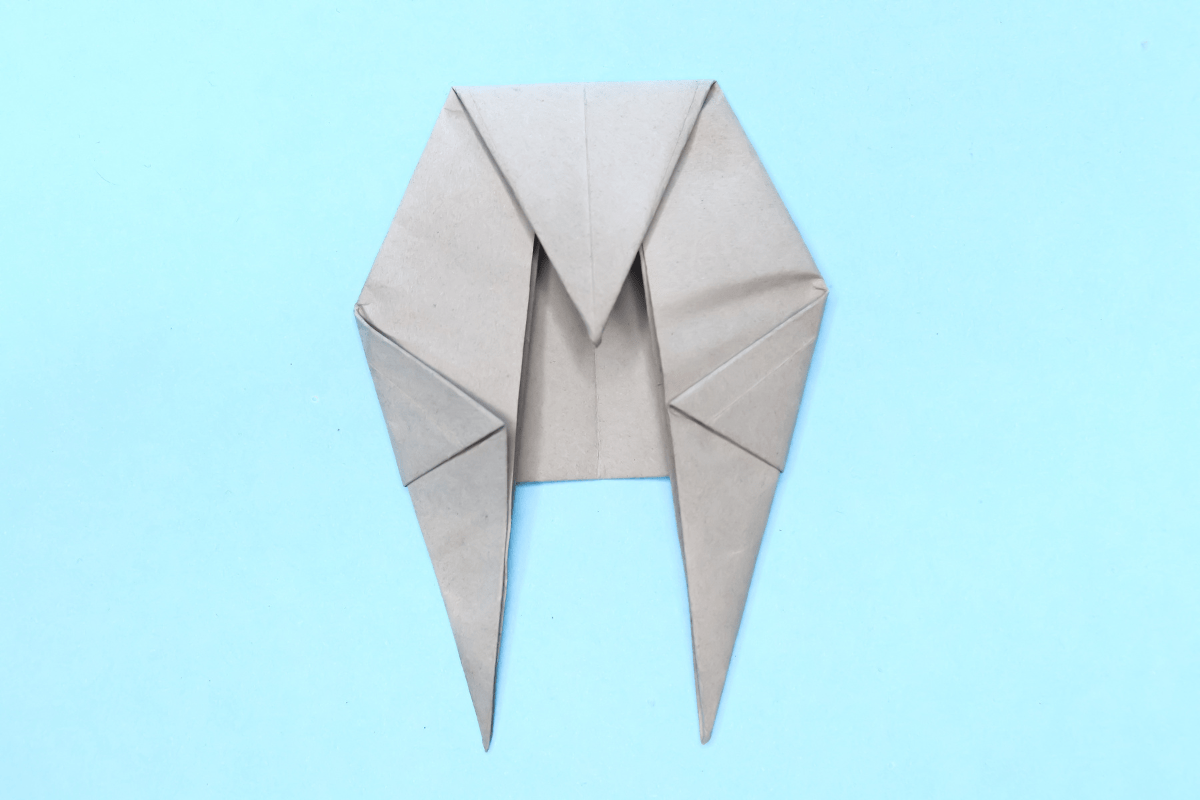
Step 10

10
Turn the figure over.
Step 11
11
Draw in the face and you are done!
Share and Comment
We would love to see your creations! Scroll down to the comments section and share a photo of your origami.
Leave a Reply