How to Make an origami Envelope

Category:
Envelope origami final step
Difficulty: Easy
Learn how to fold a stylish envelope with our easy, step-by-step instructions and helpful images.

Creating an origami envelope is a great educational project for all ages. Paper-folding activity is an enjoyable one you can do with your children at home or in the classroom. Aside from the simple instructions you can relay to the kids, they will also have fun making easy-to-fold origami envelopes. You can include how to make an origami envelope with your quality time with the kids or as gift-wrapping ideas if you have an abrupt invitation.

Don’t be concerned about the type of paper you use when making the paper envelope; any variety of paper will work. You can use this method to create an envelope if you don’t have one on hand.

The wrapping paper you use to wrap the gift can also be used as an envelope if you need one for a birthday card. You can also use patterned, colorful, or scrapbooking paper; both will work. Brown paper bags or even plain printer paper will do. If the paper has a design, do not worry because it will add elegance to the paper envelope.

Question: Thus, the paper-folded envelope will still be secure even without using any glue or paste on both sides?

Answer: Yes! Precisely, because the folding of the sides will keep the envelope closed without the help of glue or paste, even though you can use a little glue if you want it to be more firm and more secure.

Step 1
Envelope origami step 01
1
Start with a square sheet of paper. I am using an 7×7 inches origami paper.

If you only have regular paper, follow these instructions on how to make a square origami paper.

Step 2
Envelope origami step 02
2
Reposition your paper like a diamond. If you are using a two color sided origami paper then face the lighter side upwards.

Step 3
Envelope origami step 03
3
Fold the bottom half to the top half to make a triangle.

Step 4
Envelope origami step 04
4
Fold the top corner of the triangle to the bottom edge.

Step 5
Envelope origami step 05
5
Fold in 1/3rd of the right side of the triangle.

Step 6
Envelope origami step 06
6
Fold in the left side of the triangle.

Step 7
Envelope origami step 07
7
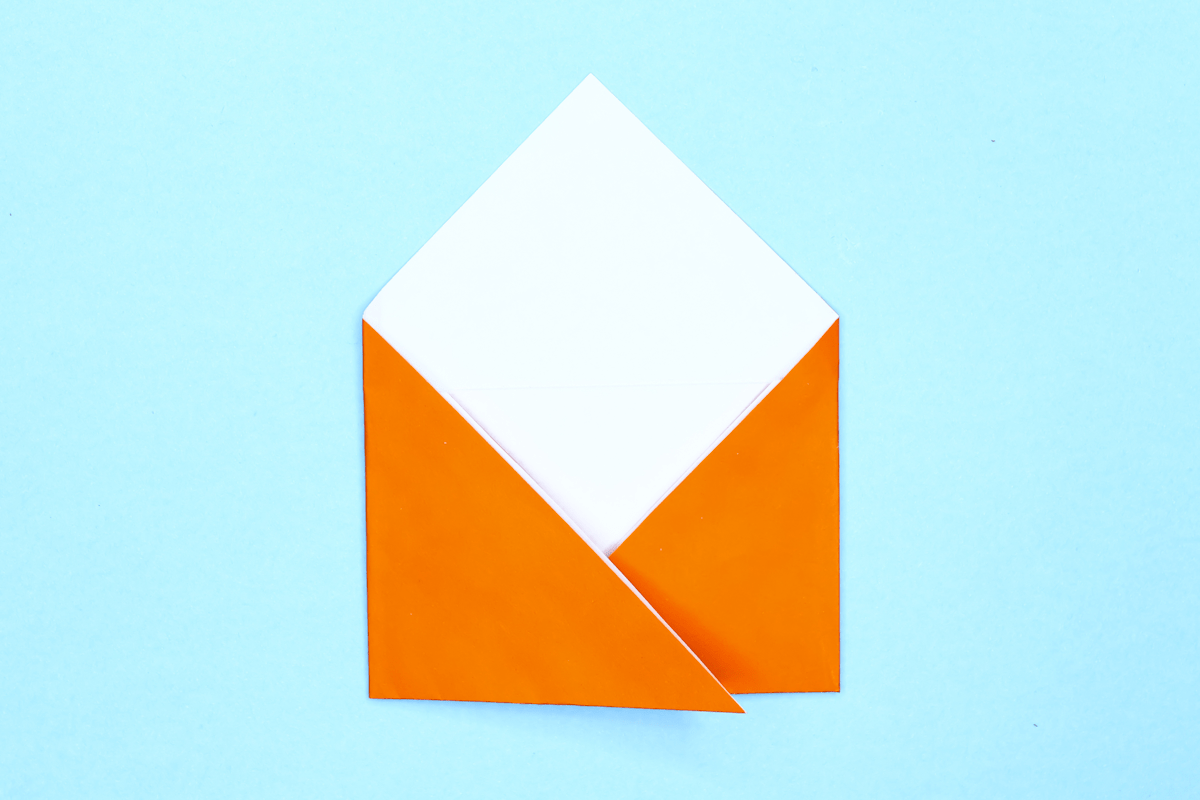
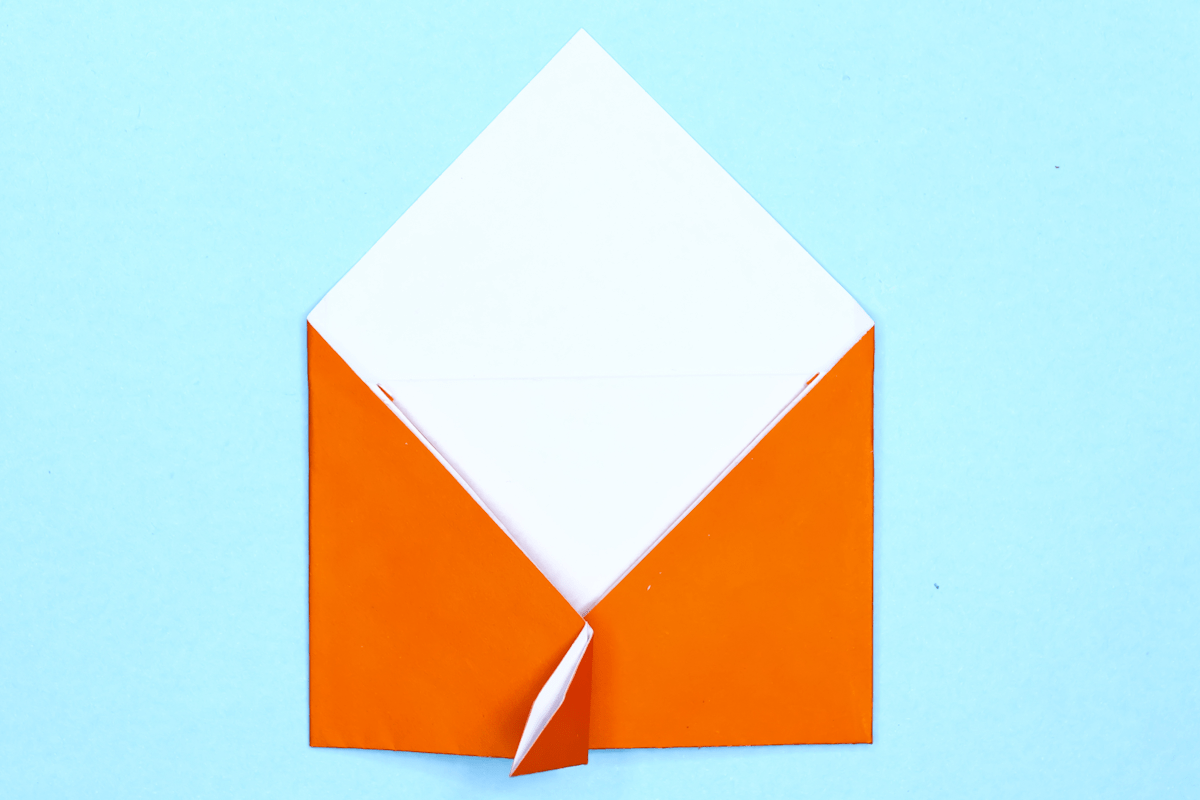
Fold that flap’s corner back out to the edge and open it a little bit.

Step 8
Envelope origami step 08
8
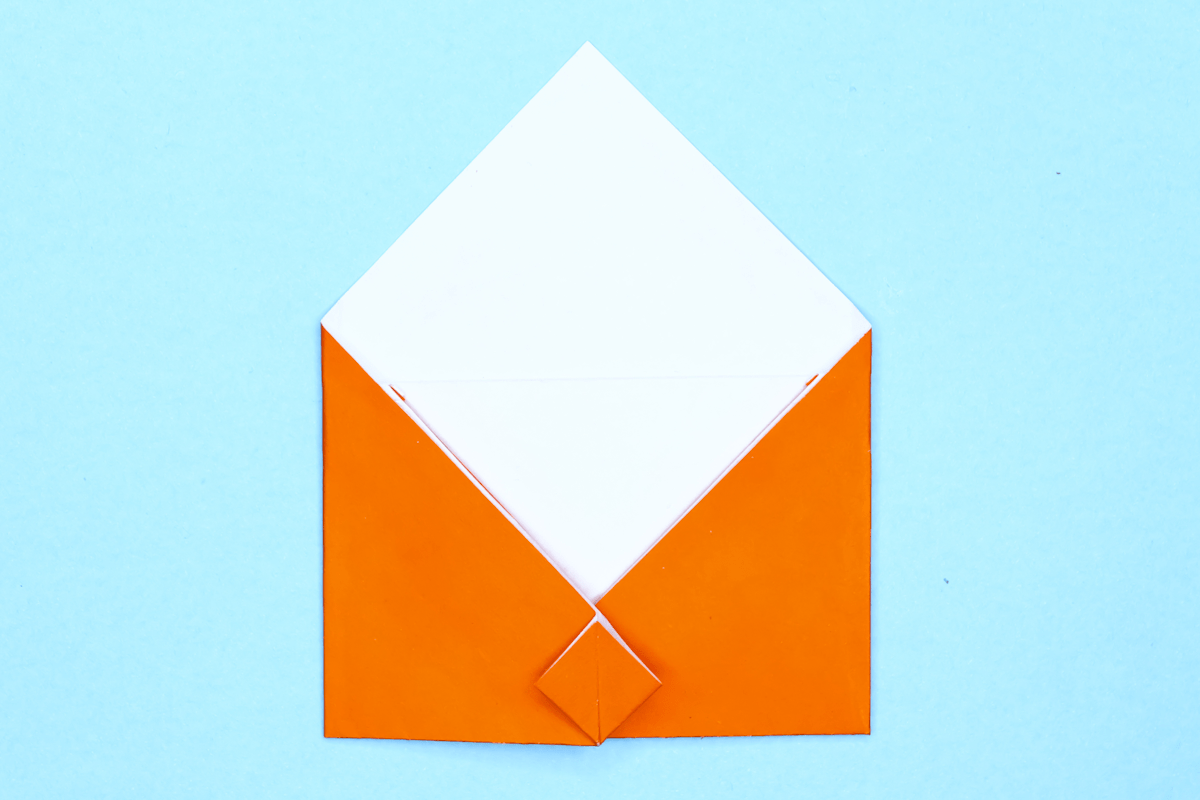
Squash the flap to form a diamond pocket.

Step 9
Envelope origami step 09
9
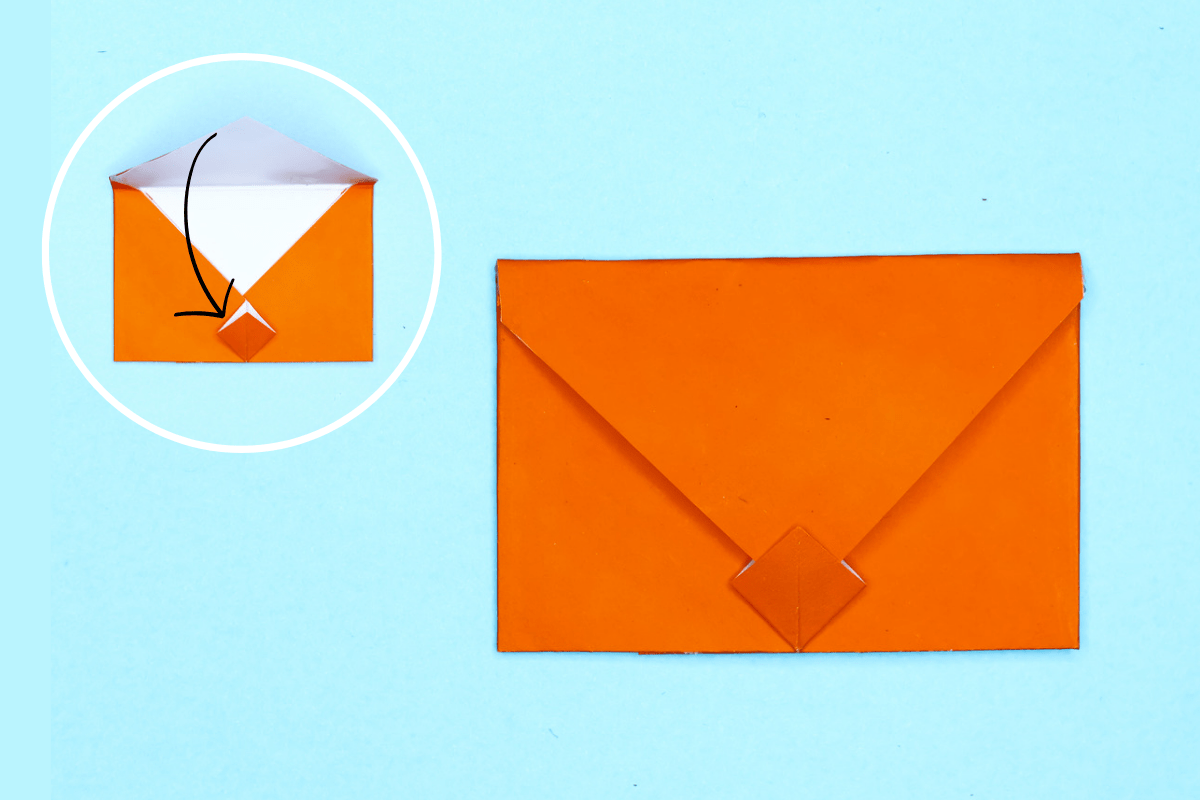
Fold down the top and tuck the tip into the diamond shaped pocket.

Step 10
Envelope origami final step
10
All done! You can write a note and stuff it in the envelope.

Comments

One response to “How to Make an origami Envelope”

  1. What size of card/paper could fit in this envelope without being folded?

Leave a Reply

Your email address will not be published. Required fields are marked *